Every week, you spend hours creating powerful and original content.
After all, great content is the secret to blogging success, right?
But you’re starting to wonder if the results really justify your time and effort.
You get worryingly little traffic, few social shares and only a trickle of email subscribers.
And it’s frustrating as hell.
As a blogger, one of your biggest priorities is driving traffic and subscribers to your blog, but so far, you’ve failed to find a strategy that really delivers.
You’ve tried buying Facebook Ads, “dominating” Twitter, creating visual content and pitching guest post ideas to high-traffic blogs.
Unfortunately, in this saturated online space, it has become tough to stand out amongst the sea of blogs and drive traffic to your own.
So what’s the answer?
Enter SlideShare — Your New Traffic Generation Platform
What if you could leverage a platform that gets more than 70 million visitors a month, won’t cost you a dime and lets you direct traffic back to your blog?
“Sign me up!” you say?
Enter SlideShare, a presentation-sharing platform owned by Linkedin.
To give a quick example of its potential, celebrity blogger, Michael Hyatt got more than 70,000 views with this nine-slide preview of his Platform course when he uploaded it to SlideShare:
“But Michael Hyatt already has a huge following,” you protest.
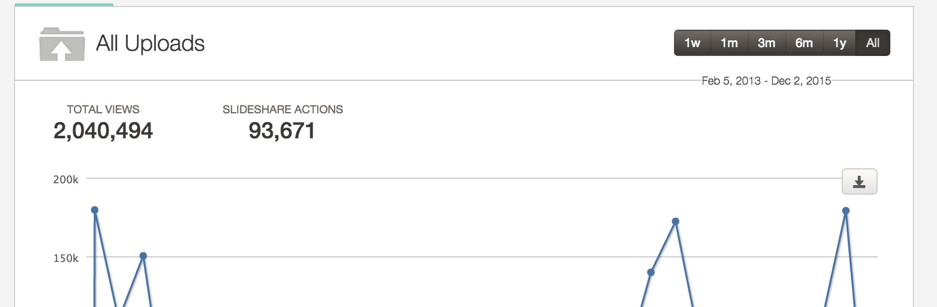
But what if I were to tell you that I started without a following and managed to garner over two million views across my SlideShare channel — resulting in over 400 new email subscribers per month.
And it all came from a single SlideShare presentation.
Here’s a screenshot from my SlideShare analytics that shows my channel’s views:
As well as getting more subscribers and helping to build my brand, SlideShare has also helped my website rank well in Google due to the links within my presentation leading back to my site:
Interested yet?
How to Give Your Content a New Lease of Life on SlideShare
Recycling your best posts as SlideShares not only extends the life of your content, it also offers a new medium for presenting your ideas and acts as a magnet for potential new subscribers.
And you can do it using tools you already have — like Microsoft PowerPoint or Apple Keynote, or online applications like Google Slides or Canva — uploading the completed slides to SlideShare.
List posts (or “listicles”) tend to work best because they convert easily to a presentation format, e.g. X Tips for Y.
Expert roundups also work great, and you can even create a roundup specifically for creating a presentation rather than a post — the format lends itself well to a series of insightful but pithy quotes.
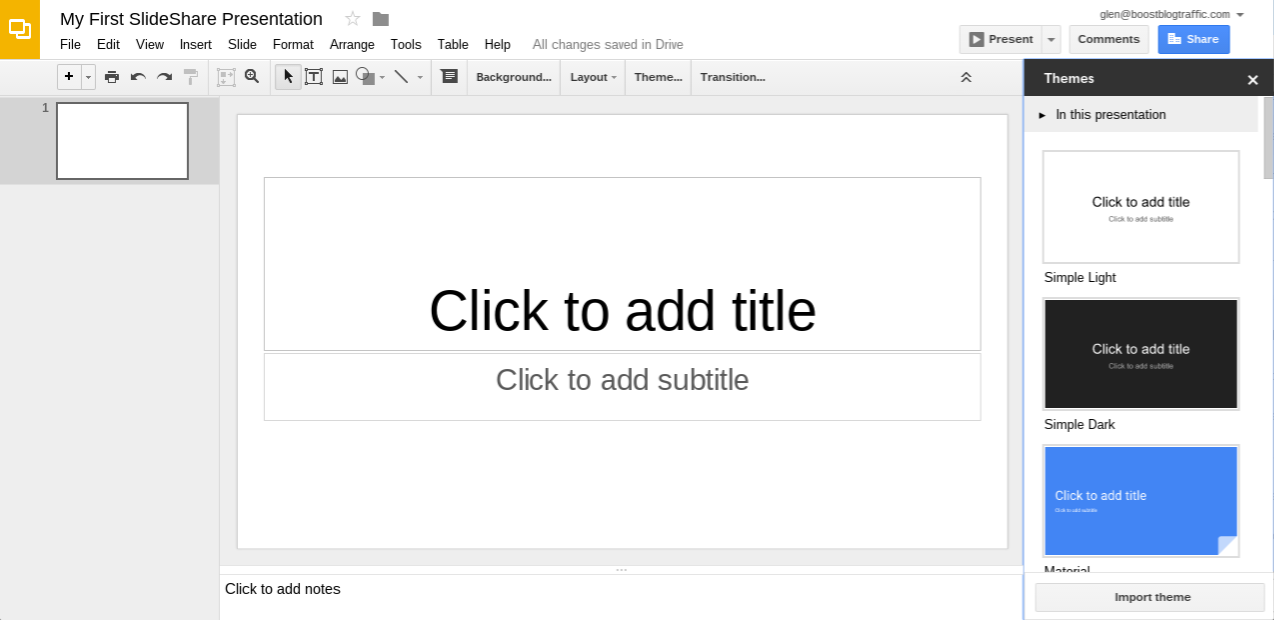
To begin, open up your favorite presentation application and create a new slide deck, choosing a suitable design template.
The image below shows Google Slides — the free presentation tool in Google’s online suite of office applications which also includes Google Docs and Google Sheets — with the available design “themes” in the right menu.
Once you have your blank slide deck open and ready to receive content, here’s how totransform your favorite post into a killer slide deck:
1) Turn Your Headline into the Title Slide
If you’ve written a strong headline for your blog post, it should make a good title for your SlideShare too, so you can copy it straight across.
Copyblogger repurposed their hit post: The 3-Step Journey of a Remarkable Piece of Content into a SlideShare that roped them 30,000 views.
Here’s the original post:
And here’s the title slide for the SlideShare presentation:
If your headline is relatively short, you could make your presentation look and sound more tantalizing by using a subtitle.
2) Make Your Subheadings the Transition Slides
The main sections of your post translate to the main sections of your presentations. Often that means you can use your section subheadings as transition slides — i.e. slides that signal the start of a new section.
Pamela Wilson from Copyblogger did this with her presentation:
This section became the following transition slide:
Keep in mind, that if your list post is epic in scale — something like “101 Ways to Promote Your Latest Blog Post” — it’s better to extract only the best 10 points or so and expound on those. A SlideShare user may be intimidated to see a deck with over 100 slides.
Also, by not including every point in your SlideShare, you give the reader an incentive to visit the original post for more detail (we’ll see how to do that later.)
As a rule of thumb, around 30-50 slides should keep your readers engaged without feeling overwhelmed.
For truly “monster” posts, you may be able to create multiple SlideShares, each focusing on a different aspect of the post.
In Copyblogger’s case, a simple 16-slide SlideShare managed to get them 30,000 views.
3) Distill Your Content into Bullet Points
Once into the content itself, you should aim to capture your main points in just a few short sentences, with each slide containing a single point.
Keep each point long enough to preserve its meaning, but brief enough that it doesn’t feel like a full-blown post was pasted into your slide deck.
Let’s see how Copyblogger does it:
If you already write in short, punchy paragraphs, you may not need much adaptation, as in the Copyblogger example above.
But a useful rule-of-thumb is to keep each point to about 10-14 words or about 140 characters, something that is brief enough to be tweeted. When in doubt, you can find successful SlideShares to model after here.
Bonus Tip: Ensure that your content slides feature any relevant keywords you’d like to rank for in Google — SlideShare automatically creates a transcript based on your presentation’s content which is indexed by search engines.
4) Add Strategic Links within Your SlideShare
So you’ve spend an hour creating an awesome-looking deck based on one of your favoriteblog posts. It looks great, the points are strong and you think the SlideShare audience will love it.
Now what?
Well, you want to make sure that some of the attention your shiny new deck receives gets channeled somewhere useful.
After all, it’s no use being a hit on SlideShare if that doesn’t also translate into more trafficand subscribers for your blog.
And if you don’t take deliberate steps to turn SlideShare “eyeballs” into blog visitors your deck will become just another lazy asset.
Directing visitors to your blog means strategically embedding links in your slide deck.
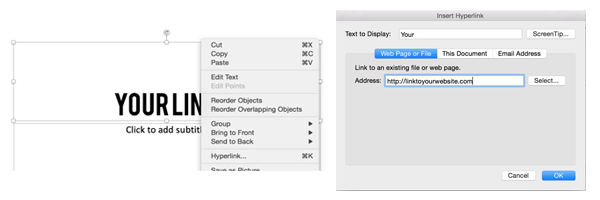
Doing this takes just a few seconds. In PowerPoint you can right-click the object you want to link from and then type or paste the address you want to link to:
Note that due to a deliberate restriction within SlideShare, only links inserted after Slide 3 will appear in the final slide deck. This is to stop people from “link bombing” the first few pages of their presentation. You have to earn your reader’s attention with your first slides and only then do you get to direct it somewhere else.
Here are some types of links to insert:
LINK TO YOUR BLOG AND SOCIAL MEDIA PROFILES
You may be surprised how often people find you via your profile information.
Content is important, but sometimes people are more interested in who’s behind that content. This is particularly true for personality-led brands like Gary Vaynerchuk and Guy Kawasaki.
If you give people the opportunity to get to know you and connect with you, some will reach out. Linking to your social profiles and main website will give viewers the opportunity to connect with you directly outside of SlideShare.
LINK TO A LANDING PAGE TO GROW YOUR EMAIL LIST
Probably the most valuable place to direct visitors from your SlideShare presentation is to a landing page that captures their email address so you can grow your list.
The best way is to offer a lead magnet (or “bribe to subscribe”) on your own blog — either using a custom page type in WordPress, a list-building plugin, or a hosted service like Instapages or LeadPages — incentivizing viewers to leave their details.
(SlideShare has a lead generation feature — LeadShare — but it can be expensive.)
Once you have a landing page, then you can promote the lead magnet within your SlideShare.
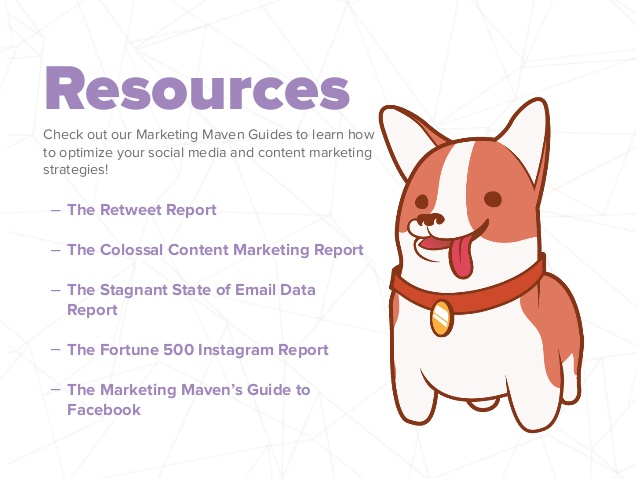
Here’s how TrackMaven promotes various lead magnets from within a single SlideShare slide:
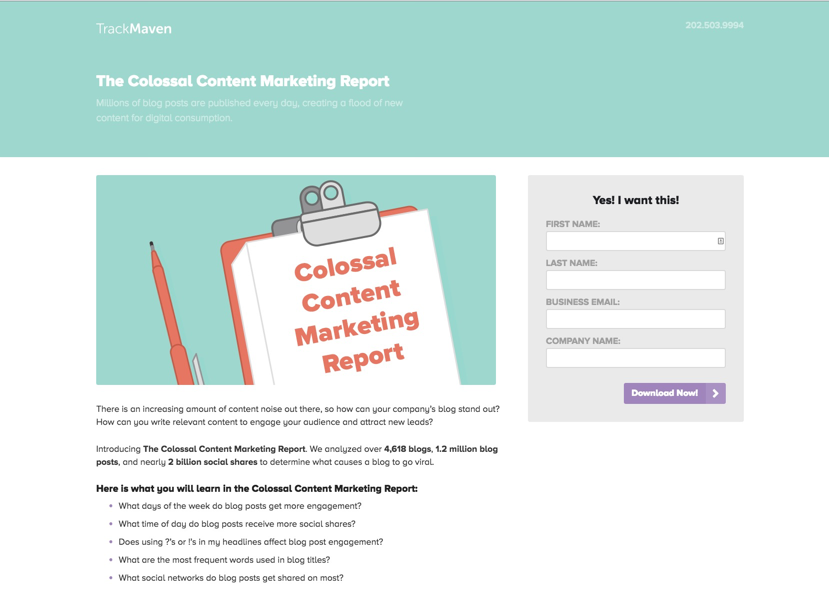
Click on any of the resources in the list and you’ll arrive at a custom landing page on the TrackMaven site, giving you access to the selected report in exchange for your contact details.
Here’s the landing page for The Colossal Content Marketing Report:
Right now you might be thinking: “This is going to take too much time!”
But just remember, perfection is the enemy of progress. It’s important to get started rather than stress over the details.
You can grab a free account with landing page software like Instapage or whip up a basic lead magnet and place it on a free Gumroad account.
Don’t agonize over the lead magnet either. Consider using free psdcovers.com for ebooks, buy a template over at CreativeMarket or hire someone on Fiverr to make your basic design look more snazzy.
To get some ideas, check out this post: The Quick and Dirty Guide to Creating Your “Bribe to Subscribe” in Record Time.
LINK BACK TO THE ORIGINAL POST ON YOUR BLOG
You can only pack so many words into a SlideShare presentation.
As a result, your slide deck may not give readers the full picture. (Remember the earlier point about being selective with what you put on your SlideShare?)
Holding back information gives visitors an incentive to head to your site for the rest of the story you intentionally left out of your teaser on SlideShare.
But for that to happen, you must make it easier for them to find the original post — by embedding links back to it. (This also helps boost the SEO value of your content.)
Try placing these links towards the back of your presentation to target people who fully consumed your content (and are hopefully eager for more.) This way, you’ll avoid backlinks to your blog competing for attention with other links in your presentation, e.g., those linking to your lead magnet.
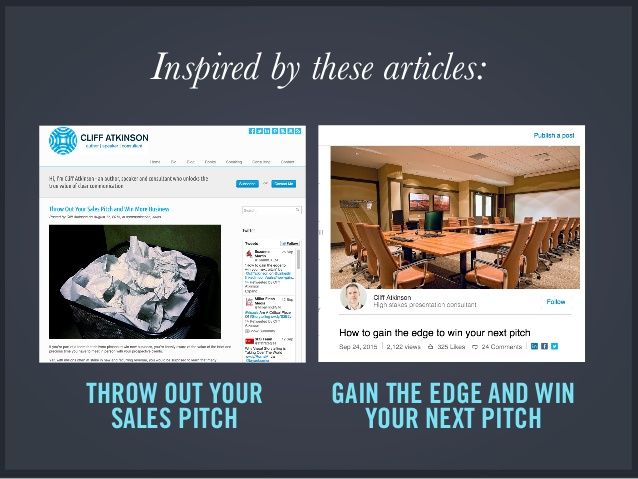
This slide, the penultimate one in a deck, links back to the two separate posts that inspired the presentation.
Once the visitor lands on your blog, you have an extra opportunity to capture their email address via a more generic opt-in form.
The general strategy is to have links with different purposes embedded at various points within your presentation to increase the chances of visitors taking some kind of valuable action.
LINK TO A SERVICE THAT PROMOTES SHARING
You want your SlideShare presentation to be shared as widely as possible on social media, so you should also embed links to encourage that behavior.
One method is to include a “Click to Tweet” link that launches a popup box for sharing on Twitter. This works particularly well if some of your slides contain quotable soundbites orquotes from invited experts. (This post describes the process.)
Another tactic that works well is to link to a service that allows the reader to “pay” for some additional asset — for example, a downloadable PDF version of your presentation — via a social share.
Here’s an example:
You can use a service like PayWithATweet to embed a simple call to action that allows the user to download the deck once they’ve sent their tweet — or shared it on another supported social network.
Spreading it on Twitter, Facebook and Linkedin not only adds to the virality of the presentation but helps you get a spike in views, which may bring it to the attention of SlideShare editors who can choose to make your deck a featured presentation.
5) Upload Your Presentation to SlideShare
Once your presentation is complete and you’ve embedded all the necessary links, it’s time to upload it.
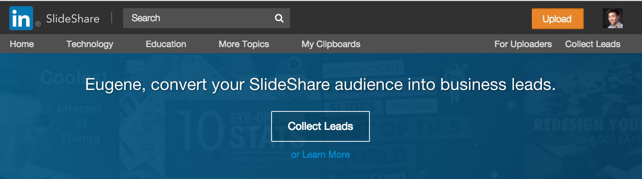
SlideShare has made it pretty straightforward to upload your decks, all you’ll have to do is click the shiny orange button at the top-right corner of the screen:
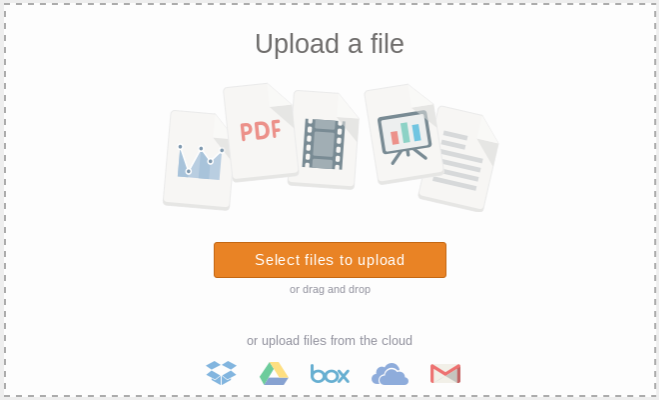
Then simply drag or select your file:
Note that SlideShare supports files uploaded as PowerPoint (.PPTX) format or PDF so you’ll need to save or export your presentation as one of those formats.
Once uploaded, you can preview your presentation by stepping through the slides in the slide deck embedded in the top-left corner.
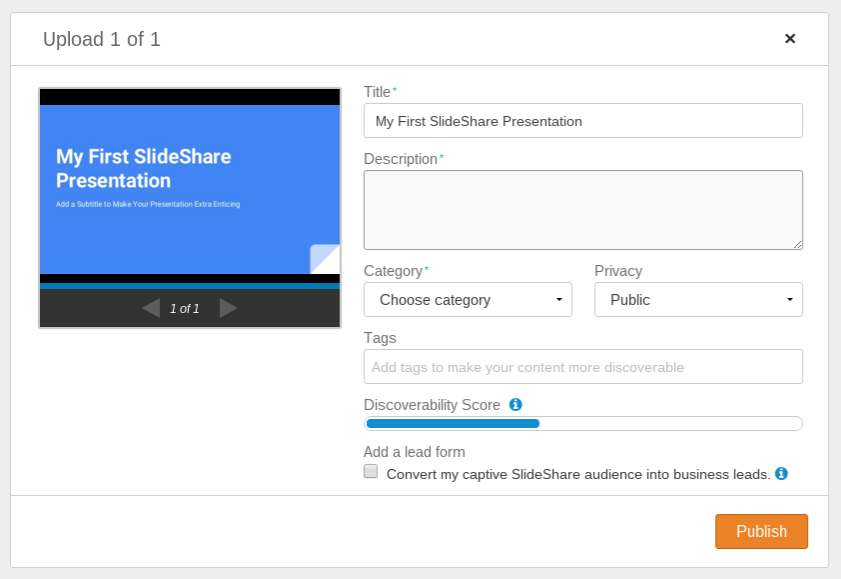
Assuming you’re happy with what you see, the next stage is to add some important metadata:
Some fields are compulsory while some are optional, but you’ll get the best “Discoverability Score” (SlideShare’s measure of how easy your deck will be for other users to discover) by completing all the fields.
Here are some quick tips for completing the fields:
- Include your target keyword in the title. Your presentation’s title will be the one that appears in any search engine results. It will also be used to create the final SlideShare URL. So it’s important to ensure that the title includes any keywords you want to rank for, particularly as you can’t change the URL afterward.
- Build curiosity with your description. Your description will appear underneath your title on Google’s results page, so use it to create interest and curiosity for your presentation. The description also appears on your presentation’s page on the SlideShare site.
- Add tags to target specific interests. Tags help your presentation get discovered by other SlideShare users searching for specific popular terms. To tap into SlideShare’s huge audience, be sure to include 10-12 tags related to your slide deck’stopic and related industry. For example, if you’re writing about digital marketing, that should be one of your tags.
6) Promote Your SlideShare to Reach the Widest Possible Audience
Uploading your presentation and giving it the right metadata is only half the battle.
Bloggers who successfully use SlideShare to drive traffic to their sites usually adhere to the following principle:
“Content creators should spend 2x the effort in promoting their content as they did creating it.” — Ross Simmonds.
Although SlideShare’s organic traffic is impressive, to get the most out of the SlideShares you create, you’ll need to drive visitors to them via conventional promotion.
EMBED YOUR SLIDESHARE ON YOUR BLOG
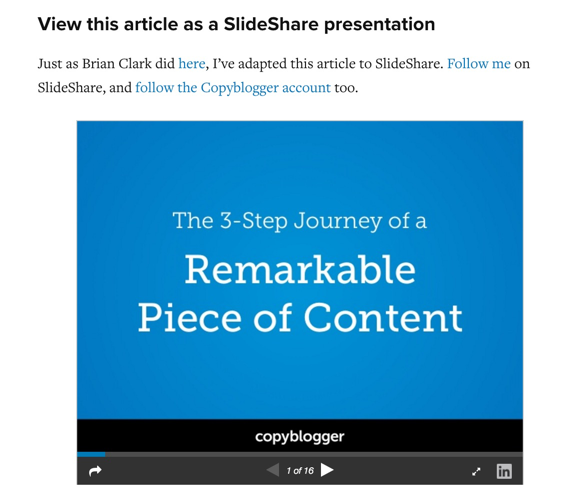
The most obvious place to embed your SlideShare presentation is within the post that originally inspired it.
Copyblogger did just that at the bottom of their post:
An embedded presentation makes an apt visual accompaniment for your post and also generates more views for your SlideShare overall.
Here’s another tip:
You can also add links to let readers share your presentation directly.
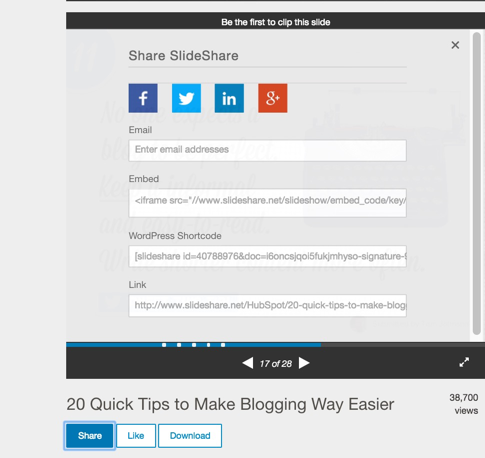
By clicking the ‘Share’ button on the main page of your SlideShare, you can grab embeddable links in the form of an iframe link or a shortcode, which you can then copy and paste into your blog editor.
EMAIL YOUR BLOG SUBSCRIBERS
Emailing your list whenever you have a SlideShare to share is one of the easiest ways to give your decks a spike in traffic.
If your audience has already read the post from which you based your SlideShare, you can tweak parts of the content to differentiate it. For instance, you could take advantage of SlideShare’s visual medium by changing the headline and including additional examples not featured in your original post.
However, you could also take the view that since you repackaged your ideas as a SlideShare, it’s almost like a new piece of content. Some people will prefer reading your content in this format.
Just don’t try to pass off identical content as something new.
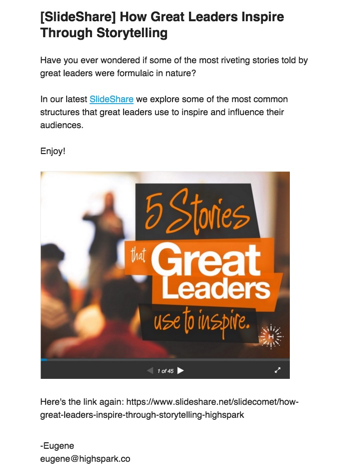
Here’s an example of how to “signpost” the fact that your content is now in SlideShare format in the subject line of your email broadcast.
EMBED YOUR SLIDESHARE INTO A RELEVANT GUEST POST
If you are actively pursuing guest posts for popular blogs, consider sneaking in a relevant embedded SlideShare, like this one of mine (pretty sneaky, huh?):
This lets you piggy-back on the site’s traffic even more by effectively including links to your content within the post — not just one text backlink in your author bio.
In this capacity, SlideShare becomes a “gateway” of sorts, leading visitors back to your main content hub.
TAKE ADVANTAGE OF NATIVE TWITTER EMBEDDING
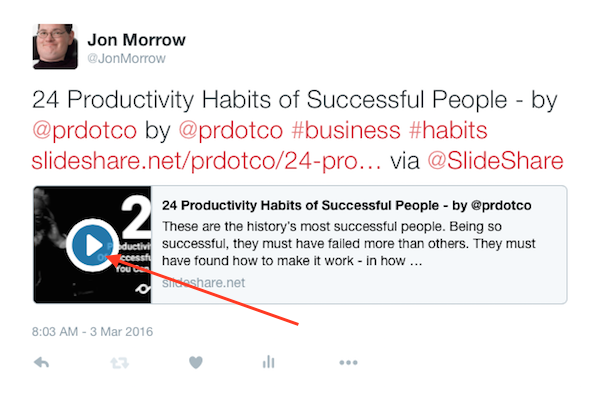
The great thing about sharing your SlideShares on Twitter is that users can watch them right there in the feed, without leaving Twitter. They just need to click the “View media” link that appears.
As a result, readers get a clickable, visual piece of content to interact with without leaving the platform they are on, resulting in significantly more engagement and conversion.
So don’t rely on other people to share your SlideShares — include them in your social media schedule and repost each one several times to give your followers the best chance to see it.
To increase the chances of your presentation being noticed, you can add an image – e.g., the title slide of your deck – using Twitter’s “Media” button.
7) Evolve Your Presentation to Maximize Your Long-Term Results
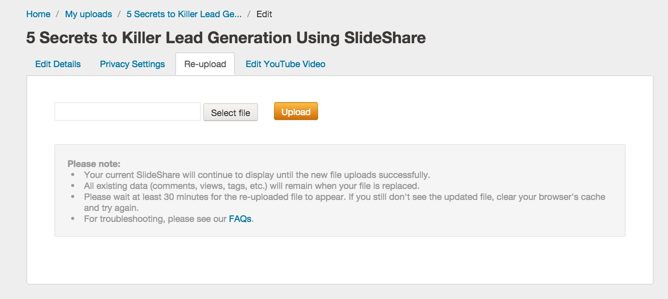
Many regular users of SlideShare know about the feature which allows you to replace the current copy of a presentation with an updated version. Here it is in the SlideShare interface:
Most people only use it for correcting mistakes they spot after the initial upload.
But as your blog grows, this feature is also handy if you update any of your posts or change your site’s branding. You needn’t be concerned that your SlideShares could hamper your new direction — the re-uploading function lets you update your presentations whenever you like.
But there’s a more strategic way to use this feature.
You can use it to change the call to action links in your slide deck.
Remember that guest post that you snagged where you embedded one of your SlideShares?
You can update this presentation to include links to your latest traffic magnet simply by uploading a new version of the presentation.
That way you’ll always have that platform working hard to drive subscribers for you.
Neat, huh?
Here’s the specific strategy I use.
FIRST UPLOAD: ENCOURAGE SOCIAL SHARING WITH “PAY WITH A TWEET”
On the first upload, I always ensure that the most prominent link is a PayWithATweet link, gaining more shares in exchange for a free download.
The initial spike in traffic should help the deck get noticed by editorial staff and other viewers on SlideShare.
Here’s an example:
SECOND UPLOAD: LINK TO A LEAD MAGNET
As soon as I start getting traction — or if the presentation reaches the SlideShare front page — I’ll re-upload my presentation, this time changing the link to the landing page which offers the lead magnet.
Here’s the slide I used to replace the one above:
With this strategy, I can use the initial interest in my presentation to raise its profile on the SlideShare site and then, capitalize on the extra exposure to funnel traffic back to my lead magnet. This results in more traffic and subscribers than I would have received without the “viral enabler” element.
Empowered Presentations still gets 20,000 views each week from this winning SlideShare:
The re-uploading feature means they can use this popular presentation to drive different messages whenever they like just by changing the call to action links.
Let SlideShare Supercharge Your Neglected Content
If you’re sick of seeing meager results from your content efforts, take a good look at SlideShare.
It’s an exceptional platform for traffic-hungry bloggers, and it’s flexible enough to work in tandem with your current efforts.
And believe me, the results can be impressive. SlideShare has helped me build an email list of more than 10,000 subscribers from nothing, rank highly on Google for relevant terms and drive tons of traffic to my site.
If you follow the steps above, you’ll be well on your way to your own SlideShare success.
Just begin with the content, tools and contacts you already have. Then scale your efforts as you see results.
Why not jump into your blog’s archive right now and find a post that will benefit from the SlideShare treatment?
The sooner you get started, the sooner it’ll take off.