

Let me guess.
You signed up for Mailchimp, AWeber, or Constant Contact and created an opt-in form to snag yourself some new subscribers for your blog.
Maybe you even went the extra mile and created a juicy opt-in offer to tempt them to hand over their precious email addresses.
Then you posted it on your sidebar and in your footer, and maybe you were smart enough to throw up a feature box too.
And now you can’t figure out why the subscribers aren’t rolling in.
Every morning you anxiously check your email dashboard, hoping that today will be the day you finally see a ton of new signups.
But every morning is a letdown. Just one or two new subscribers (and let’s be honest — it’s just one if you don’t count your mom).
The truth is, these tactics used to work wonderfully — but they don’t any more.
Your readers have evolved, and your blog needs to adapt.
But how?
Why Opt-In Forms Don’t Work Like They Used To
Not long ago you could put opt-in forms in all of the obvious places on your blog and expect a pretty good signup rate.
However, this passive form of collecting opt-ins doesn’t work anymore.
You can’t just collect subscribers like a barrel collects rainwater. You have to capture them.
That means first you must get their attention. Because most readers have developed “opt-in form blindness.”
When almost every blogger is posting opt-in forms in the same places, we tend to block them out. It’s just the way our brains work.
I have an uncle who lives close to a hog farm. He can’t smell a thing, even though we suffocate whenever we visit him. He’s been exposed to “hog farm smell” for so long that he doesn’t notice it anymore.
After a while, we ignore what’s familiar. That’s why you need to think outside of the box to get your call to action in front of your visitors.
Here are eight creative places to put opt-ins on your blog to jolt you out of your subscriber-gaining rut.
1) Right Under Your Headline
Your headlines are the first point of contact between your audience and your posts. They catch the readers’ eyes, pique their interest, and draw their gaze down the page.
Leverage that attention you snagged with your killer headline by inviting your readers to subscribe to your email list underneath the headline of your blog post. That real estate is often needlessly sacrificed to name and date information.
Steve Chou from MyWifeQuitHerJob.com uses this method on his blog:
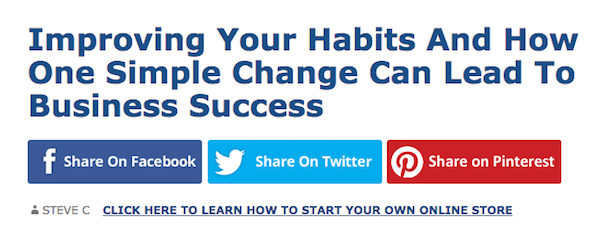
This allows him to capitalize on the attention he has already generated with his headlines.
Do the same on your website with your opt-in form to reach readers when they’re the most captivated.
This requires some minor theme customization to add the correct link to your byline, but if you don’t know how to do that sort of coding, you can always hire somebody on Fiverr.
2) Beneath Your Comment Form
Your readers get all the way to the bottom of your post.
They’re interested, and engaged enough to want to scroll down and leave comments.
Now, imagine if each person was automatically signed up to your email list after leaving a comment.
It would be pretty sneaky, for sure, but it’s still tempting, right? After all, they’ve just typed their email address in the comment form — the piece of information you desperately want.
But while you can’t sign them up without asking (sorry kids), you can make it super easy for them to sign up if they want to — with a simple check box.
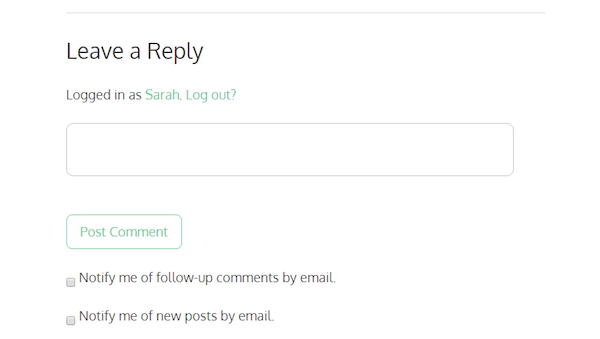
I use this method on my blog to capture the emails of those who comment, should they be interested in subscribing. Which they usually are, if they are willing to go to the trouble of leaving me a comment.
3) On a Fancy “Welcome Mat”
Quick test:
When readers land on your website, how many choices do you give them?
My guess is you probably give them a lot to choose from — and you might not even know it.
See, every single action that your visitors can take on your website makes the decision of which one to take, harder. That means that every link in your menu, every widget in your sidebar, every headline, picture and button is in competition for your visitor’s attention.
I know better than to pull my visitors’ attention in too many directions, but I still give them 11 choices of what to do on my home page:
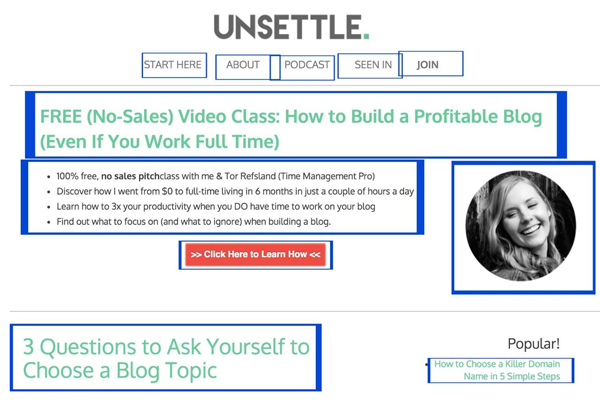
That’s a lot of decisions!
Studies show that when presented with too many choices, we choose none of them. That’s why isolating your opt-in opportunity works so well — and you can do that using a Welcome Mat.
A Welcome Mat is a free tool by SumoMe that acts as a “squeeze page” or landing page by rolling down to welcome visitors to your website when they land on a specific page of your choice. This eliminates all other distractions, but it doesn’t break the readers’ attention while they’re digging into your article.
You can also use the “instant landing page” feature to make it a landing page, so visitors don’t miss it when they scroll down.
When you isolate your call to action like this, you’re removing all of the choices your visitors have to make and presenting them with only one choice: will they opt in, or not?
The Art of Charm has used this method on its home page:
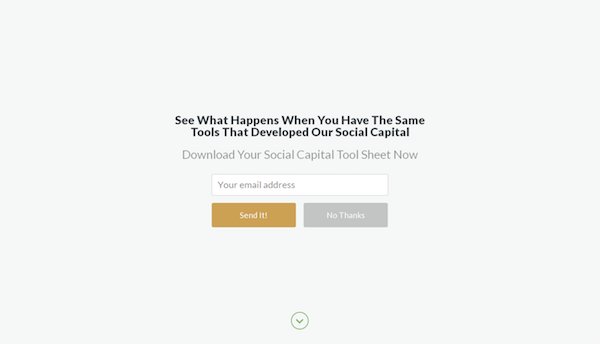
The Welcome Mat invites you to sign up for a Social Capital Tool Sheet when you land on the website. If the visitor doesn’t want to sign up, they can either scroll down, click the arrow, or click “no thanks” and the blog will re-appear.
This is not the same thing as a popup, incidentally. A Welcome Mat is like a red carpet that rolls out the moment you step up to the door; a popup is like an annoying rug that suddenly shows up and trips you halfway down the hallway.
4) In a Custom Sidebar
When somebody lands on an article on your blog, they see the same sidebar that you have on your homepage.
Maybe it has a photo of you. Perhaps it even has a freebie or an opt-in offer. But overall, it looks like a boring old sidebar for a boring old blog.
So what if you jazzed up your sidebar a bit? What if you could have a customized sidebar depending on which article your visitor lands on?
That’s right, a custom sidebar with a custom opt-in offer, targeted precisely at the people who are interested in what you’re teaching in that article.
In other words, the perfect “content upgrade.”
A content upgrade is when a blogger creates a complimentary resource for their blog post and offers it as an “upgrade” delivered via email. These can help you grow your list quickly– so imagine what you could do with sidebars like this!
The couple behind Screw the Nine to Five use custom sidebars to host an image of a content upgrade perfectly paired to the post you’re reading:
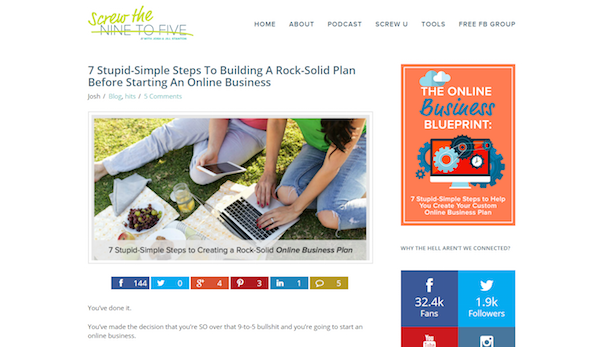
It’s different from the normal sidebar, shown below:
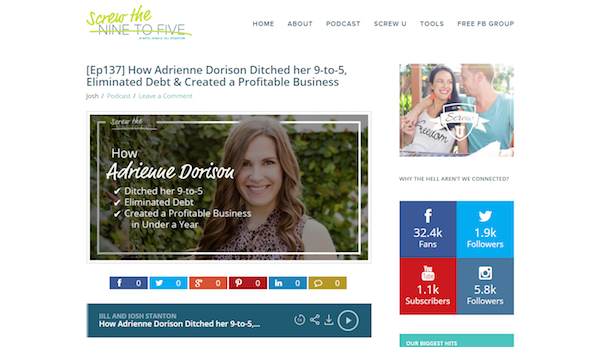
This technique will make your readers go from “Hmm, that’s interesting,” to “Whoa! I want that!”
5) In Your Main Navigation Menu
If you checked your analytics right now, chances are you’d find that your “About” page is one of the most popular pages on your website.
Usually, people will read a post on your blog, and then get curious about who you are. They’ll move up to your navigation menu and click on your “About” page.
Why not use some of that navigation bar momentum and place a link to opt into your email list as well?
Your menu is prime real estate on your blog, so use it!
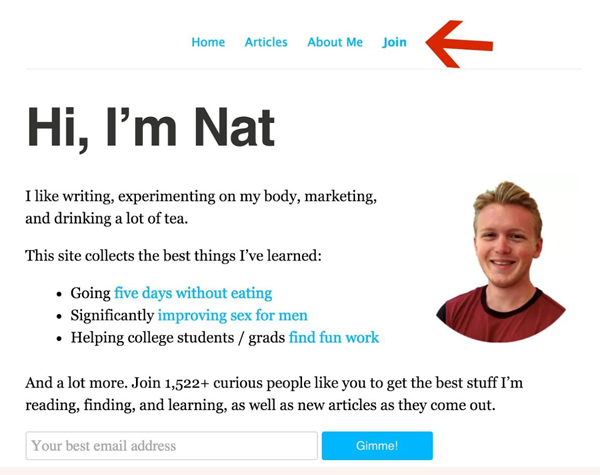
Nat Eliason uses this method on his website to promote his newsletter:
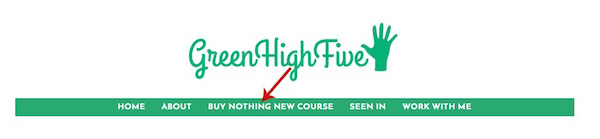
You can also promote your opt-in offer in your menu bar, like Assya Barrette does for her free minimalism and green living challenge:
This is one of the most simple opt-in opportunities to implement as it can be done right in your WordPress dashboard under Appearance > Menus > Custom Links. You can change the color, font, and size of the link with HTML to make it stand out.
You can either add a link to a landing page that collects emails, or create a two-step opt-in process as I have with mine, where the visitor clicks the button and brings up an on-page opt-in form:

You do this by clicking the “Join” button on my menu, which brings up this pop-up.
If you have a LeadPages account, you do the two-step opt-in process with a LeadBox. If not, you can do it in the SumoMe List Builder app with a Click Trigger.
This converted between 5% and 18% for me over the past week.
6) Above Your Blog Footer
If you’ve ever seen a scroll map or content analytics about your website, you’ll know that some people don’t make it to the bottom of your page.
On the plus side, you can be sure that those who do are definitely interested in what you’re doing. So grab that forward, action-taking momentum by the horns and give those people an option to subscribe to your email list at the bottom of the page.
Foundr does this by including an opt-in box above its footer:
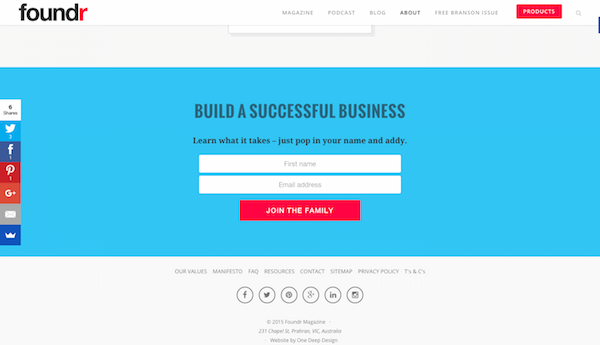
Everyone else puts their bottom-most email capture form in the footer itself. But remember, your Internet-savvy readers are filtering out that common stuff. To keep their attention, always put your capture form above your footer rather than in your footer.
7) On Your “404 Not Found” Page
How many times has this happened to you?
You’re browsing a website and really enjoying the content. You see a link to a post that looks interesting, and you click it…
Only to be taken to a 404 page and told that no such page exists.
Broken links can happen to the most diligent of bloggers, and when they do, readers will see something like this:
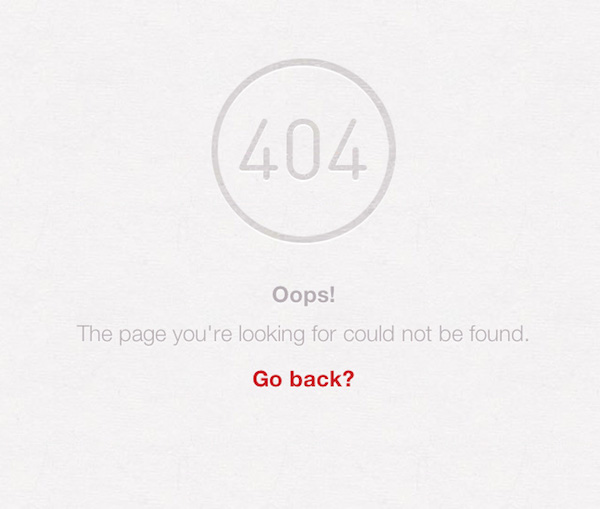
Pretty unfriendly, right?
Most people will bounce from your 404 error page. They were running on your blog’s content like a treadmill, feeling a sense of flow. Suddenly, the treadmill shuts down. To get started again, they have to go through the trouble of resetting everything: browsing back, finding their place, and figuring out where to go next.
So they figure, why not skip the trouble and end the workout there? Their momentum stopped abruptly, and chances are they won’t return.
Turn this flop into an opportunity. Most 404 pages just tell you there’s nothing there. But why not give your reader something else to do on your 404 page? Something like subscribing to your email list?
Tor from Time Management Chef optimized his 404 page to tell readers that they’ve 404’d, but also to offer them something, so all is not lost:
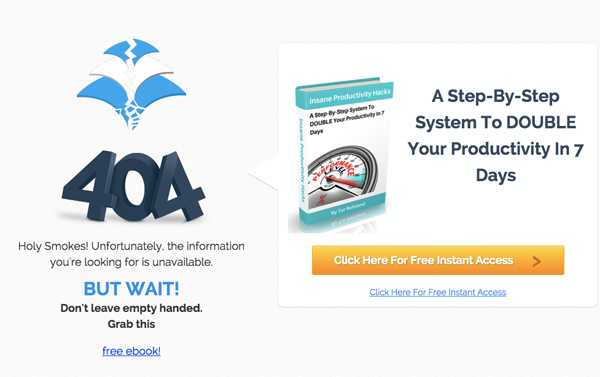
This trick helps you capture the people who were already engaged enough with your website to have performed a search or clicked around.
You can create an optimized 404 landing page with a tool like LeadPages or ThriveLeads. If you don’t have a landing page tool, you can turn any WordPress page into your 404 page using this plugin.
8) In Your Post Excerpts
I talked earlier about putting content upgrades in custom sidebars and, of course, content upgrades are not a new idea.
Many bloggers use this strategy to grow their email lists, but almost all of them incorporate the call to action for the content upgrade at the end of the post itself. This means you miss everyone who doesn’t make it to the end of the post — all the “scanners” and those who were pulled away in the middle by some distraction or another.
So instead of using the same strategy as everyone else, why not include the content upgrade in the post excerpt on your home page by placing it at the top of the post before the “read more” button?
This captures the attention of all the visitors who land on your homepage — not just those who make it to the very end of your post.
Brian Dean from Backlinko.com uses this strategy on his home page with his “Free Checklist” box:
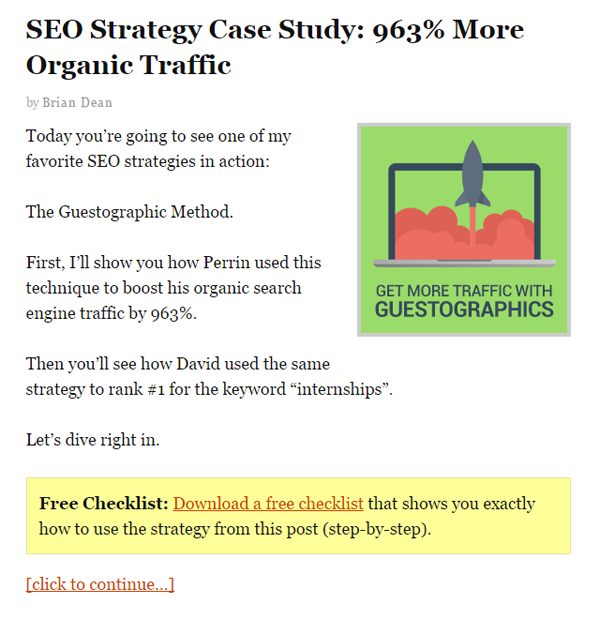
This entices readers to click on the blog post as they can see that it has extra value. It can also convert readers much sooner instead of relying solely on them noticing your link at the bottom of the post.
You can create a box like this by inserting an “alert” paragraph class in the HTML of your blog post and then linking to a popup or landing page within the “alert.”
9) Within Your Blog Archives
Have you ever landed on a blog that led you down a rabbit hole? You read one post, and then another post, which led you to the archives — pages and pages of them — where you found yourself spending hours reading whatever caught your eye.
If you’re impressed enough with the content of the blog to go back into the archives, I bet you’d also be far more likely to sign up for the blogger’s email list if they gave you the opportunity.
That’s where your own archives come in.
Instead of just relying on your home page to do all the heavy lifting, incorporate an opt-in form on your archive page, too.
Bryan Harris from Videofruit.com does this, as you can see in the screenshot below. His opt-in form offers a free list-building checklist, which fits right into his archives related to list-building:
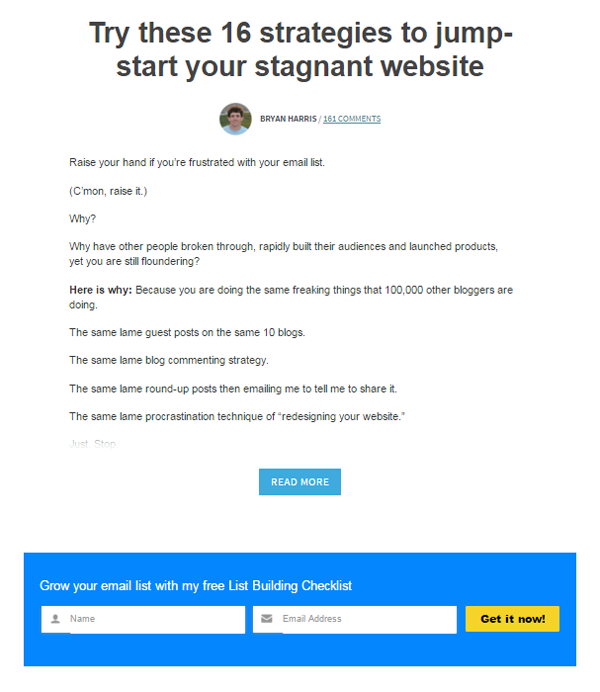
When readers are binge-reading your content, it’s a good sign. It means you’re doing something right! Don’t let it turn into a one-time-only binge; use their enthusiasm as an opportunity to capture their email addresses.
10) On Your About Page
As I was saying earlier, your “About” page is one of the most visited pages on your website, right?
And you’ve probably worked hard on it to keep your visitors’ interest and share a bit more about you and what value they’ll get from your blog. So why not harness that “getting to know you” vibe by asking them to subscribe to your email list?
Not including opt-in forms on your “About” page is like meeting somebody at a party who you really hit it off with, and then leaving without ever getting their phone number. So be sure to include opt-in opportunities at least once or twice on your “About” page.
I have a button to an opt-in box on mine that converts at 52%:
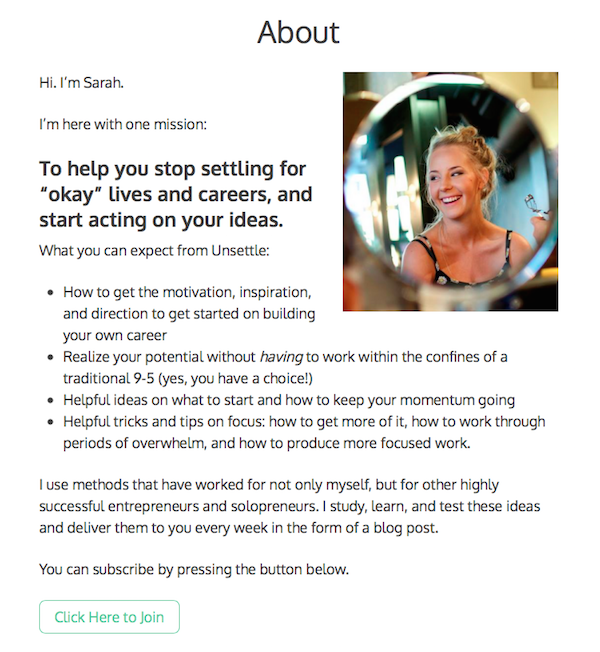
What’s more, the subscribers who opt in from my “About” page tend to be more engaged with me, because they feel as if they already know me.
Capture the people who land on your “About” page so you don’t miss the chance to connect with them over the long term.
Don’t Let Your Blog Visitors Become Missed Connections
You know that section on Craigslist called “missed connections”?
It’s where people reach out to those they wish they had connected with in person, though usually it’s too late.
That’s the way it is on your blog when you don’t capture your readers’ email addresses. They become missed connections.
So instead of letting your casual visitors slip through your fingers, never to be seen again, grab their attention and do something with it.
Put your opt-ins where readers least expect to find them, then capture their email addresses so you can begin to build meaningful relationships.
Because there is no “missed connections” page for lonely bloggers.
To view the original article Click Here
No comments:
Post a Comment